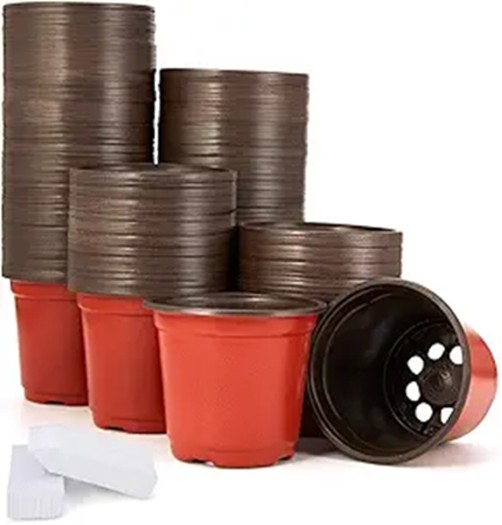
Use individual pots or multi-cell trays. We generally suggest using 2-4” nursery pots or 6-cell trays. Instead of purchasing containers, you can repurpose a variety of plastic containers or get free pots by asking your friends, family and neighbors or by sharing information about your hub and putting out an ask in your community via “Buy Nothing” groups on Facebook, NextDoor, or other types of social media. For all growing containers, ensuring proper drainage is key! See additional notes on the different types of growing containers below.
Pots
We recommend 2-4” nursery pots for most plants, including Grindelia spp. (gumplant), Encelia californica, buckwheat, and bladderpod.
4” diameter pots do not take up much space while allowing seedlings plenty of room to develop a strong, healthy root system before requiring transplanting.
Starting with pots can save the extra step of transplanting out of smaller 6-cell trays.
Disposable plastic cups (eg., red Solo cups or large yogurt tubs) can also be reused as pots. Make sure to poke several holes in the bottom to allow for proper drainage.
If you collect used pots, make sure to clean/sanitize them before reuse with vinegar/water (?).
Multi-cell trays (pony packs)
6-cell trays are great for milkweed since, ideally, you will be giving away 5-6 milkweed plants per person.
4- or 6-cell trays are also a great option for Clarkia spp. and yarrow..
More advanced growers can opt to use higher count multi-cell trays, but you may need to transplant seedlings into larger pots once they get too large for a cell.
Pots
Multi-cell trays
2. Soil
Use a good quality, well draining soil. You can purchase soil or premade mixes at different price points or make your own mix. See list and pictures of suggested soil and mixes below.
Premade:
Cactus and succulent potting mixes (eg., Miracle-Gro and others)
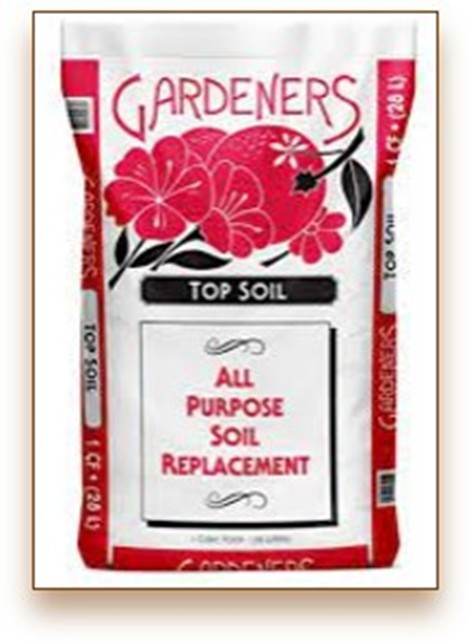
Top soil (eg., Gardeners brand organic top soil in the red bag – Chelsea G. who runs a hub in Lemon Grove in San Diego County has had great success using this soil which is also very affordable, <$3 per cubic foot at Lowe’s)
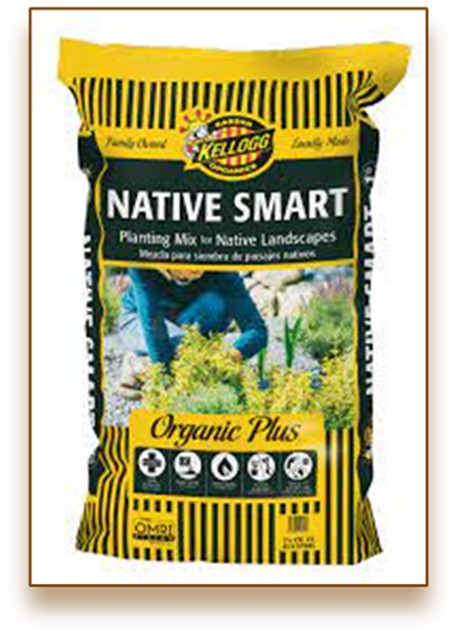
Native plant mixes (eg., Native Smart and others)
Happy Frog brand potting soil
Make your own:
Mix cactus soil with the Gardeners top soil in a 50/50 mix.
Mix cactus soil with all purpose soil in a 50/50 mix.
Mix half potting soil 1/4 perlite and 1/4 sand for drainage.
**Note that ideal mix may vary based on region/microclimates; see Regional Planting Charts for more information.
3. Seeds
Get free seeds specific to your region from the Monarch Fellowship. Through the online store <link>, you can search for what seeds are offered for your region of California. Please also check the map on each product page to confirm that the plant grows in your specific area. Then, order the seeds you want to grow. {insert picture of seed packets?}
4. Tools
A few simple tools can help you with growing your seeds.
Small shovel, trowel or spoon – to help you fill pots with soil.
Planting tray/flat – to keep your plants organized. You may be able to get free, used planting flats from nurseries (local and big box stores).
Bucket – to mix or prep soil, including adding moisture.
Spray bottle – to help with gently moistening soil after planting seeds.
Trowel
Tray/flat
Bucket
Spray bottle
Step 2/Second: Plant your seeds
1. When and where to plant your seeds?
Nectar plants
We recommend that you plant nectar seeds in Fall or Winter (generally around November, depending on your climate), as planting during this time helps plants establish before the summer heat. Nectar plants need the cold outdoor temperatures of fall and winter to germinate. Some annuals like Clarkia and California poppy can be started in late winter or early spring when the days are getting longer because they grow quickly. If you live in the Central Coast, plant buckwheat in February so that the dampness of winter doesn’t rot the seeds in the pots. For other exceptions by region, make sure to check the planting charts <link>.
Milkweed
**NOTE** DO NOT plant milkweed if you live close to an overwintering site for Western Monarch butterflies. Check the map at https://www.westernmonarchcount.org/map-of-overwintering-sites/. Where you live will determine when you can plant milkweed. Generally, wait to plant milkweed until temperatures are consistently 75-80 degrees Fahrenheit, as milkweed seeds need heat to germinate. That may be earlier for inland areas and later for some coastal regions in Northern California. In extreme hot zones like the San Joaquin Valley or Inland Empire, you can star as early as November and continue up to early February; you want to giveaway the plants so they can be planted into the ground 6-8 weeks before temperatures reach 100 degrees on a daily basis or else they may not establish. If you are unable to giveaway the plants before it gets too hot, you can keep your plants through the summer in the shade and hand them out in the fall. Be aware that native milkweed goes dormant in the Fall and will re-emerge in the Spring; the rhizomes survive in the winter especially in cold areas. For all locations, if you want to have your milkweed ready earlier in the season, you can plant seeds indoors and try using heat mats, a mini greenhouse or a plastic cover, and/or grow lights.
2. Pretreat seeds if needed.
Some seeds require pre-treatment before planting. For example, lupine seeds require soaking overnight in water or scarification (scratch the seed on a rough surface or sandpaper) prior to planting. Bladderpod seeds also need an overnight soak in water. Contrary to popular belief, narrowleaf and showy milkweed do not need cold stratification (incubation at cold temperatures to induce germination). However, some people have found success by soaking milkweed seeds overnight in water and then keeping them wrapped in moist paper towels for a few days before planting. For more information about seed pre-treaments, check the planting charts <link>.
3. Prepare the potting mix.
Make sure you have well draining, moistened soil.
If not using premade soil, prepare your soil mix in a bucket.
If desired, moisten your premade or self-prepared soil in the bucket. The soil shouldn’t be overly wet. It is perfect when it begins to form a clump when squeezed in your hand.
Fill your chosen pots or trays with your soil mix. Push down firmly to settle the soil but do not overly compact it.
If soil was not pre-moistened, water your soil in the pots or trays. Note that dry soil can be hydrophobic, so water can run off the sides and not be fully absorbed into the soil when poured onto the top of the soil. You can more thoroughly moisten your soil in pots or trays by placing them in a shallow container of water to wick up moisture from below. You may need to add more soil as the moistened soil compacts.
4. Plant the seeds.
Note that these are general directions; see the regional seed charts <link> for additional details.
Dig a small hole in the soil that is 1-2 times the seed size. You can also insert the eraser end of the pencil into the soil to make a hole. Most seeds should be covered twice their width with soil. Very small seeds can be surface sown. Also, some seeds like milkweed need sunlight to germinate, so they can be sprinkled on the surface of the soil followed by a thin layer of soil or sand on top; see Regional charts <link> for more information (?).
Place 2-4 seeds in each hole (depending on purity and germination rate).
Lightly cover seeds with more soil or sand.
Gently water your seeds. You do not want to displace the seeds by overwatering, which can interfere with successful germination. If using a hose, put it on the lightest or “mist” spray setting. You can also use a spray bottle for more gentle administration of water.
Don’t forget to label your pots or trays, if growing more than one type of plant.
5. Watering and additional care.
These are also general directions; see the Regional seed charts <link> for more detailed information.
Nectar plants
Watering: Monitor the soil moisture frequently to ensure the seeds get the water they need. Keep the soil moist but not soaked. Once the seeds have emerged, they will begin to drink up the water and require more frequent watering, particularly after the plant starts filling the pot with roots.
Light: Place your containers in a sunny spot (use a south-facing window if indoors) to sprout. In hotter temperatures, shade (partial sun??) during the day is recommended. Avoid too much direct sunlight while seedlings are young to avoid overdrying.
Protection: In colder regions like the Northeast and the Sierras, you’ll want to protect your seeds from weather with a plastic dome. You can also use anything you have handy, like an inverted plastic cup, a plastic bag or wrap, or screen material, as long as they have holes for aeration. In warmer temperatures, a cover is not needed.
Fertilizer: Generally, native plants do not need fertilizer. However, if nectar plants are in pots for many months, they may need plant food. For instance, if the seeds germinate and grow a set of true leaves and the temperature is ideal but the plants stop growing, they likely need plant food. Ideally, use an organic fertilizer, which is gentler, and use half the dosage stated in the directions.
Transplanting: If your seedlings were started in multi-cell trays, they can be thinned and transplanted into 4-6” pots after two sets of leaves have developed. If your seedlings were already started in small pots, they can be distributed during spring.
Giveaways: Make sure to give the recipients of your plants the plant care information from Hub Resources <link>.
Milkweed
Germination: Milkweed can take anywhere from 10 days to several weeks to germinate depending on outdoor temperatures. If planted in Fall (Oct/Nov), this may take a few weeks; in Spring to Summer, seeds may germinate within 7-10 days (the warmer the quicker).
Watering: Keep the soil consistently moist but not soggy, as wet conditions can lead to root rot. You can allow the soil surface to dry slightly before you water again, but keep in mind that your seeds are in the top layer of soil and will need to stay moistå. You may need to water more frequently as the plant starts filling the pot with roots and as the temperatures become hotter. During warmer temps, you can put plants in a non draining tray and add an inch of water to the bottom of the tray so that the roots and soil can self water from below.
Light: Place the pots in a location with good light. Full sun is ok in winter or in locations where sun is not severe like in the summer. If you start seeds indoors, use a sunny window or greenhouse. If you experience heat waves as you approach summer, use a shade cloth or move the plants out of direct sunlight into the shade so that the tender plants do not burn.
Protection: Remember that heat can reflect off of bricks, concrete, rocks, and your home, creating too warm of an environment for your milkweed. Consider having a thermometer in the area you are growing to monitor the temperature. If you live in a windy area, group seedlings in trays or boxes and place them on the downwind side of a building or other barrier. If you get snails or other critters, use a mesh screen to cover your plants or elevate them off the ground. You can also cover small seedlings with a plastic bottle to speed up the growth process and prevent monarch butterflies from laying eggs on them while they are too small to provide enough food for hungry caterpillars.
Transplanting: Once multiple seedlings germinate and establish 2-3 sets of true leaves, you can thin into additional pots. Keeping several milkweed plants together is ok; they usually don’t mind a little crowding.
Giveaways: Make sure to give the recipients of your plants the plant care information from Hub Resources <link>.
**Remember that native gardening can be unpredictable! Don’t get discouraged if you experience any failures; even very experienced gardeners can run into issues. This is all part of the learning process, and over time you’ll figure out what works best for you and your particular microclimate. Don’t forget that you can always post questions on our Hub Resource Facebook group.
For your upcoming giveaways, its best if milkweed reaches this height to maximize transplanting success.